
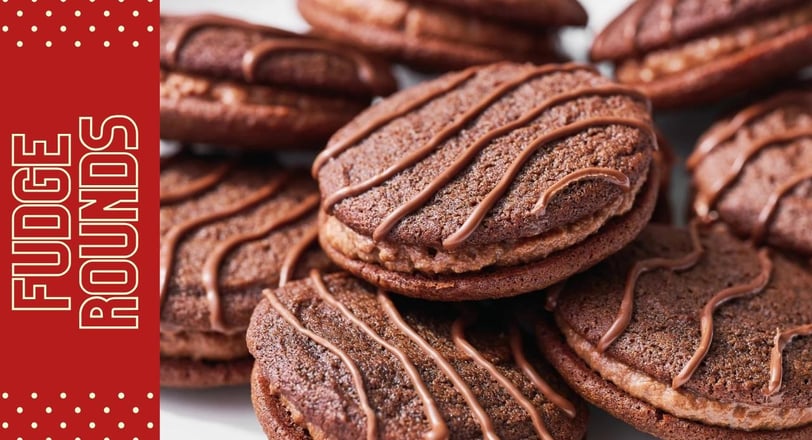
Fudge Rounds
If you're craving that nostalgic, chewy, chocolaty treat but want something a little more homemade and less processed, then these homemade fudge rounds are perfect for you! They’re just like the ones you remember from the store but even better. You’ll get all the fudgy, soft goodness, but without the artificial flavors. Plus, they’re surprisingly easy to make, and your family or guests will absolutely love them.
What Are Fudge Rounds?
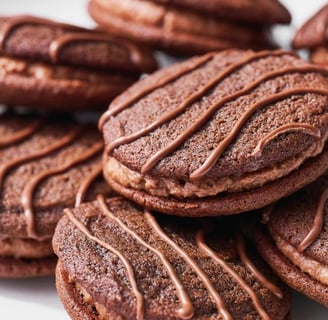
Fudge Rounds are basically two soft, fudgy chocolate cookies sandwiched together with a rich, chocolate buttercream. If you've ever had a Whoopie Pie, think of it like that, but way more chocolaty! You can easily find the store-bought version in most American grocery stores, but making them at home takes the flavor to a whole new level.
Why You Will Love These Homemade Fudge Rounds
They taste just like the store-bought version, but you know exactly what's in them because they’re made from scratch.
They’re much easier to make than you might think.
You don’t even need to chill the dough before baking.
You can make the frosting ahead of time for convenience.
They freeze really well, so you can enjoy them later!
How to Make Homemade Fudge Rounds
Ingredients for the Cookies:
10 tablespoons (142g) unsalted butter, at room temperature
¾ cup (150g) granulated sugar
1 large egg, at room temperature
1 tablespoon light corn syrup
1 teaspoon vanilla extract
1¼ cups (159g) all-purpose flour
6 tablespoons (32g) unsweetened cocoa powder
1 teaspoon cornstarch
½ teaspoon baking soda
¼ teaspoon fine salt
For the Chocolate Drizzle:
½ cup (85g) milk chocolate chips
1 teaspoon vegetable oil
For the Filling:
1 stick (113g) unsalted butter, at room temperature
2 tablespoons (11g) unsweetened cocoa powder, sifted
1½ cups (188g) powdered sugar, sifted
2 tablespoons warm water (about 100°F)
½ teaspoon vanilla extract

Instructions
Making the Cookies:
1. Preheat your oven to 350°F and line two baking sheets with parchment paper.
2. In a stand mixer (or with a hand mixer), cream the butter and sugar together for about 2-3 minutes, until light and fluffy. Add the egg, corn syrup, and vanilla, and mix again. Be sure to scrape down the sides.
3. Mix the flour, baking soda, cornstarch, cocoa powder, and salt in a separate bowl.
4. Slowly add the dry ingredients to the wet ingredients, mixing on low speed until everything is combined. The dough should have a slight stickiness and be soft.
5. Use a 1½-tablespoon scoop to drop dough balls onto the prepared baking sheets. Bake for 8-9 minutes, just until the cookies puff up and the edges set. Let them cool for a few minutes on the sheets, then transfer to a wire rack.
Decorating the Cookies:
1. In the microwave, melt the chocolate chips and vegetable oil together, stirring every 15 seconds until the mixture is smooth.
2. Top each biscuit with a drizzle or pipe of chocolate, then refrigerate for at least half an hour to set.
Making the Filling:
1. Beat the butter in your mixer until it's smooth. Beat in the powdered sugar and sifted cocoa powder until fluffy for about 3 minutes. Use a scraper to clean the bowl's sides.
2. Add the warm water and vanilla, then beat for another 2 minutes until light and creamy.
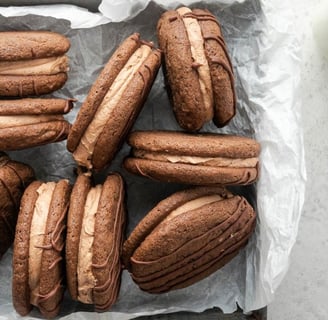
Assembling the Fudge Rounds:
1. Spread or pipe the filling onto half of the biscuits' flat sides.
2. Make your own Fudge Rounds by sandwiching another cookie on top.
3. They can be frozen for up to a month, kept in the refrigerator for up to five days, or kept at room temperature for one day in an airtight container.The colder they are, the fudgier they’ll taste!
Recipe Tips
▶ Room Temperature Ingredients: Using room temperature butter and eggs makes a big difference. It helps create a lighter, fluffier dough.
▶ Don’t Overbake: These cookies are best when they’re just set on the edges and still soft in the middle. Overbaking will make them too dry.
▶ Use a Cookie Scoop: A scoop ensures your cookies are all the same size, so they bake evenly.
▶ Cool on a Wire Rack: Let the cookies cool on the sheet for about 5 minutes, then transfer to a wire rack. This prevents overbaking and helps them stay soft.
Can You Freeze Homemade Fudge Rounds?
Yes, They freeze perfectly and taste amazing even when eaten straight from the freezer. Simply wrap each Fudge Round separately in plastic wrap and keep them for up to a month in an airtight container.
How Long Do Homemade Fudge Rounds Last?
They’ll last at room temperature for up to a day, but I recommend storing them in the fridge for up to 5 days. They taste even more fudgy when they’re cold!
Which Cocoa Powder Should I Use?
For the best flavor, go for a high-fat natural cocoa powder. If you can’t get your hands on a fancy brand, Ghirardelli unsweetened cocoa powder is a great choice—it’s affordable and has a rich chocolate flavor. Avoid Dutch-process cocoa powder here, as it can affect the rise of the cookies.
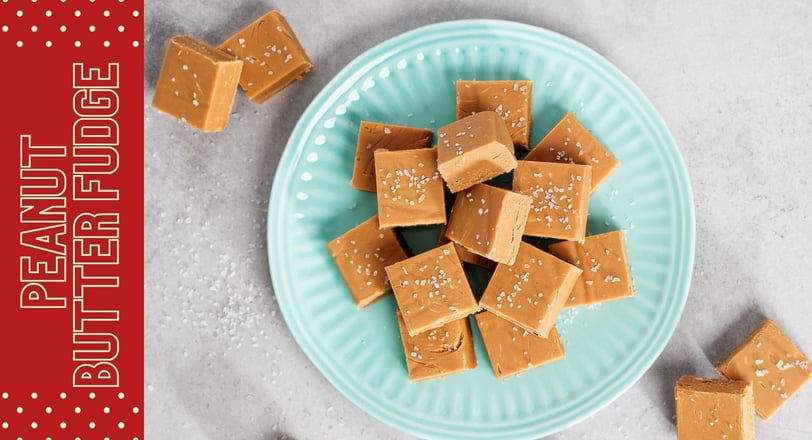
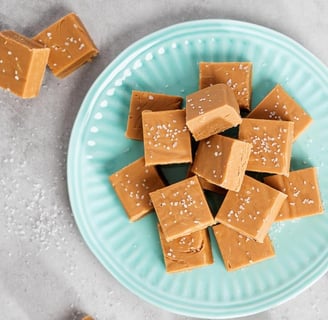
Peanut Butter Fudge
Peanut butter fudge is one of those classic treats that's perfect for sharing. This creamy peanut butter fudge is the ideal choice if you're looking for something delicious to bring to a party or take home. It tastes fantastic, is quite simple to make, and only needs basic ingredients. Plus, I promise it’s the best recipe for creamy, melt-in-your-mouth peanut butter fudge you’ll ever try!
Ingredients You’ll Need
You probably already have most of the ingredients sitting in your kitchen, but just in case, here’s what you’ll need to pick up:
Butter: You’ll start with a stick of butter for that rich, creamy base.
Brown sugar: This gives the fudge a rich, caramel-like richness.
Confectioners' sugar: It gives the fudge its smooth, melt-in-your-mouth texture and is also known as powdered sugar.
Milk: This helps in making the mixture just thin enough to pour.
Vanilla extract: A little bit of vanilla makes all the flavors.
Peanut butter: Smooth peanut butter is needed to get the perfect creamy texture.
How to Make Peanut Butter Fudge
Peanut butter fudge is surprisingly simple to make. Here is a quick detailed instruction:
Melt the butter: Melt the butter in a saucepan over medium heat. After it melts completely, mix in the milk and brown sugar.
Boil: Bring the mixture to a boil and let it boil for about 2 minutes, stirring frequently to keep it from sticking.
Add peanut butter and vanilla: Remove the pot from the heat and mix in the vanilla essence and peanut butter until smooth and well blended.
Mix with confectioners' sugar: The confectioners' sugar should be put in a large mixing bowl. After adding the hot peanut butter mixture to the sugar, use an electric mixer to whip everything until it's smooth and creamy.
Pour and chill: Transfer the mixture into a dish of about 8 by 8 inches. After smoothing it out, place it in the refrigerator for approximately one hour, or until it settles.
Slice and enjoy: Once firm, cut it into squares and enjoy!
How to Store Peanut Butter Fudge
To keep your peanut butter fudge fresh and delicious, store it in an airtight container. It will stay good at room temperature for up to a week. If you prefer it a little firmer, store it in the fridge where it will last for up to two weeks.
Can You Freeze Peanut Butter Fudge?
Yes, you can! Peanut butter fudge freezes really well, making it a great make-ahead treat. Wrap each piece tightly in wax paper, then wrap again in aluminum foil or place in a freezer-safe container. It will keep in the freezer for up to three months. When you’re ready to enjoy it, just let it thaw overnight in the fridge.
Peanut Butter Fudge Recipe
Ingredients
½ cup butter
1 (16 oz) package brown sugar
½ cup milk
¾ cup peanut butter
1 teaspoon vanilla extract
3½ cups confectioners' sugar
Directions
1. Melt the butter in a saucepan over medium heat. Stir in the brown sugar and milk, then bring it to a boil. Stir constantly and let it boil for two minutes.
2. Remove from heat, then stir in the peanut butter and vanilla extract until smooth.
3. The confectioners' sugar should be put in a large mixing bowl. After adding the peanut butter mixture to the sugar, use an electric mixer to whip it until it's smooth.
4. Pour the fudge into an 8x8-inch dish and chill until firm, about 1 hour. Once firm, slice into squares and enjoy!
Your Go-To Guide for Chocolate Muffins:
Olympics Chocolate Muffins Recipe ↗
For More Articles Check: KoolKitchen.pk ↗
Energize your cooking journey with our exceptional tips and tricks! Kool Kitchen's latest articles will empower you with the culinary knowledge you need. Don’t miss out on the chance to level up your skills—start reading now for unique insights!
Useful Links
Topics


All Copyright Reserved © Kool Kitchen